Data & Results
Scenario Management
One of IAMDD's most powerful features is its ability to test "What-If" scenarios without permanently altering your baseline project data. This allows you to rapidly evaluate alternatives like drought constraints, future municipal expansions, or hardware upgrades.
Creating Scenarios
By default, your project always runs on the Baseline scenario.
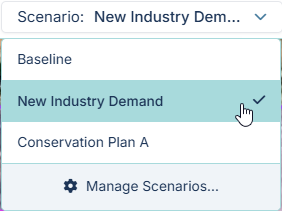
- Open the Scenarios Dropdown located in the top menu bar.
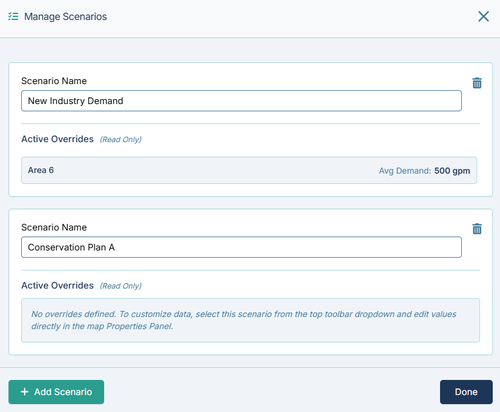
- Click Manage Scenarios... to open the Scenario Manager.
- Click Add Scenario to build a new alternative reality (e.g., "Future Industry Demand" or "Conservation Plan A"). You can maintain up to three distinct custom scenarios alongside your baseline.
Editing Scenario Data (Overrides)
To make changes to a scenario, first select it from the top menu bar so it becomes active.
When a custom scenario is active, open the Properties Panel for any node, pipe, or area on the map. You will notice the input fields visually change:
- Inherited Values (Dashed Border): Fields with a dashed border indicate that the scenario is currently inheriting the value from the Baseline.
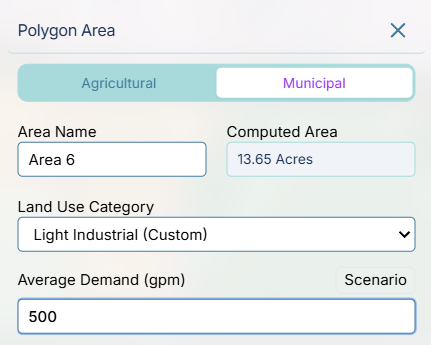
- Scenario Overrides (Blue Highlight): If you change a value while a scenario is active, the input box will highlight blue and a small Scenario badge will appear. This indicates that the value has been "overridden" and this new number will only apply to the currently active scenario. Your Baseline data remains completely untouched.
Running and Comparing Scenarios
When you click Run Simulation, the engine executes the hydraulic solver strictly for your currently active scenario.
To compare how a scenario performed against your baseline design:
- Ensure you have run simulations for both the Baseline and your custom Scenario.
- Open the Results Menu from the top navbar.
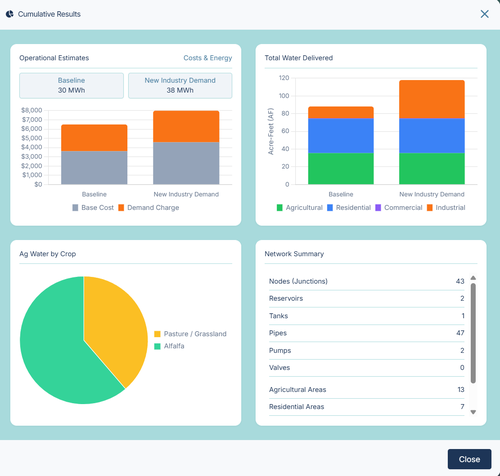
- Select Scenario Time Series. This opens a dedicated analytics dashboard where you can select a specific Junction and view a line chart graphing the pressure/flow differences between the Baseline and all computed scenarios side-by-side.